Malware Analysis Techniques: Solving the 'UnpackMe' Challenge
As a malware analyst, we received an unknown piece of malware (CyberDefender UnpackMe) and our task is to dissect its components, understand its operational mechanics, and uncover its functionalities.
Often, as a malware analyst, I receive vague file samples and get asked to analyze them. What I mean by vague is that they either unknown to most Public threat intelligence platforms or they do exist with low/high detection rate often labeled with generic detection names. Those are mostly hueristic detections which rely on behavioral patterns or characteristics rather than specific signatures.
Heuristic detections often provide limited details, requiring further investigation.This is due to relying on generalized behavior, such as unusual system interactions or network activities, which might not be explicitly malicious but suspicious enough to trigger a deeper analysis.
In all cases, I usually perform the analysis with the following goals in mind:
Determine if the sample is actually doing something harmful, that is true or false positive.The second most important thing to be concerned about is the malware capabilities & the risk associated with it.
In our current scenario, we are mostly going to uncover & highlight some of the main capabilities of the sample and answering the challenge questions as we progress. Along the way, we will learn various techniques and work arounds to tackle some of the challenges encountered that hindered our dynamic analysis of the malware.
First of all, I`d like to examine my sample using basic static analysis by throwing the sample on PEstudio, DIE for quick triage. We will not spend too much time in this phase as the sample seems to be packed, no visible strings, entropy seems to be high which indicates some degree of packing.
 Entropy
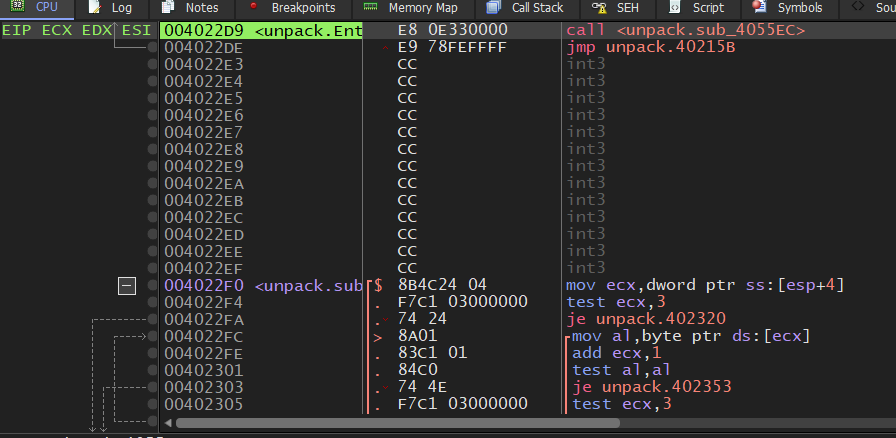
We saw VirtualAlloc as one of the API calls being imported from the imports address table of the sample, so, Load the sample in x32dbg, and let`s simply start by adding a breakpoint on VirtualAlloc
 ViruallAlloc
After we run the program, we hit our breakpoint
 ViruallAlloc
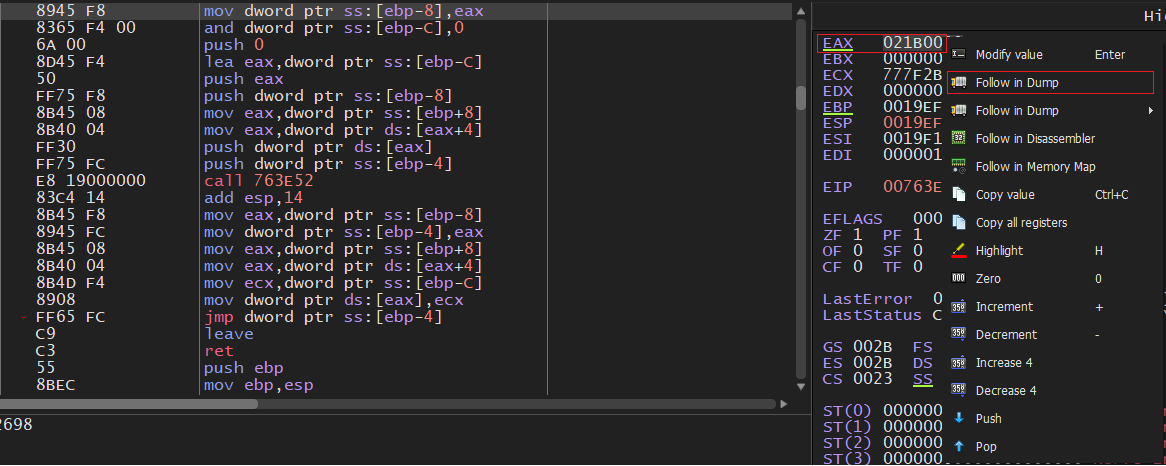
Continue until we return back from the system DLLs (kernal32, etc), and observe the address returned in EAX
 EAX Address
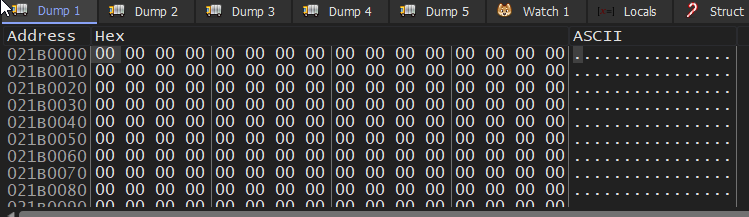
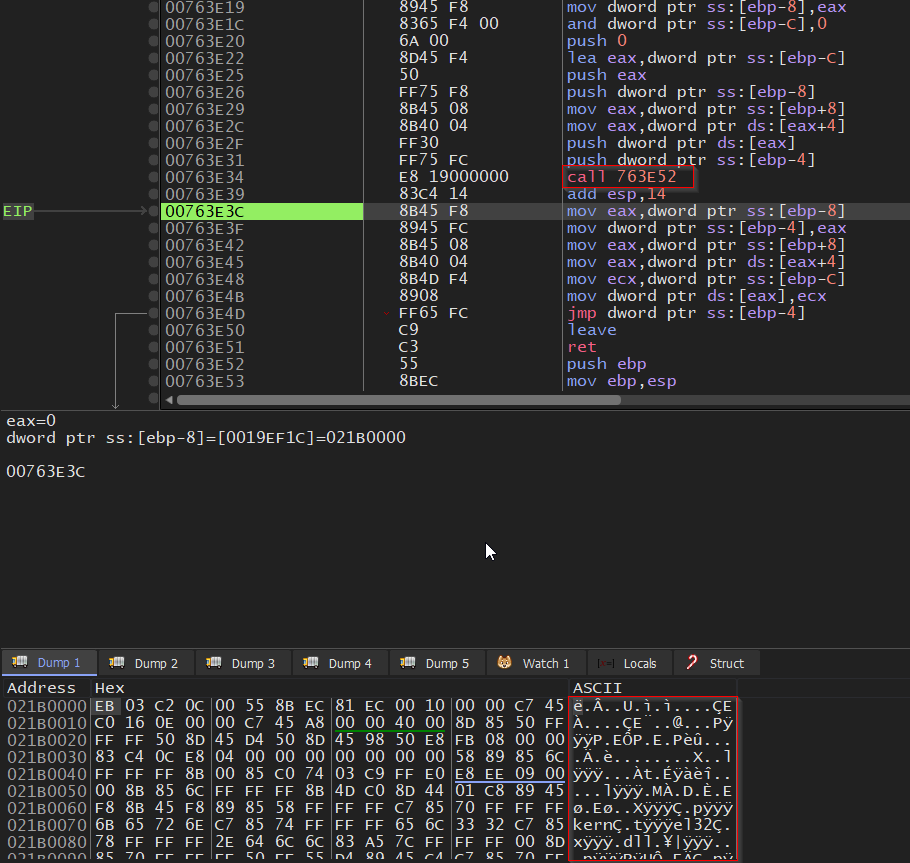
Allocated space by VirtualAlloc is currently empty, stepping over a few instructions, particularly after the next call (call 763E52 in my case), the memory address started to populate, this memory segment will contains the unpacked binary that malware execution will be transferred to.
 Empty Allocated Space
 Function 763E52
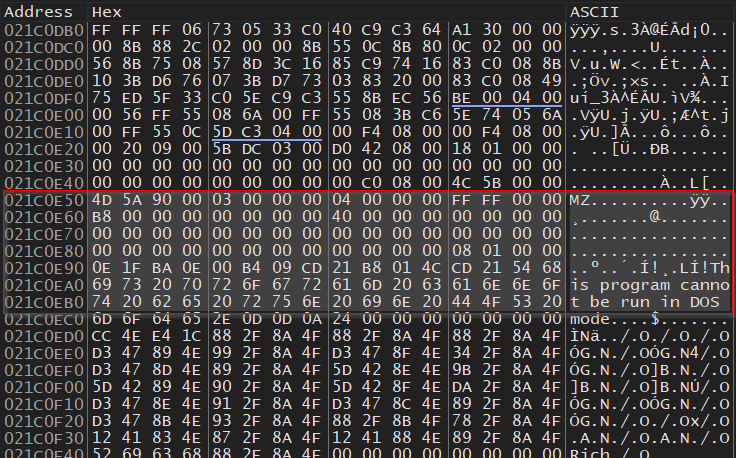
Scrolling down a bit, we can see the start of an executable file (MZ header).
 MZ Header
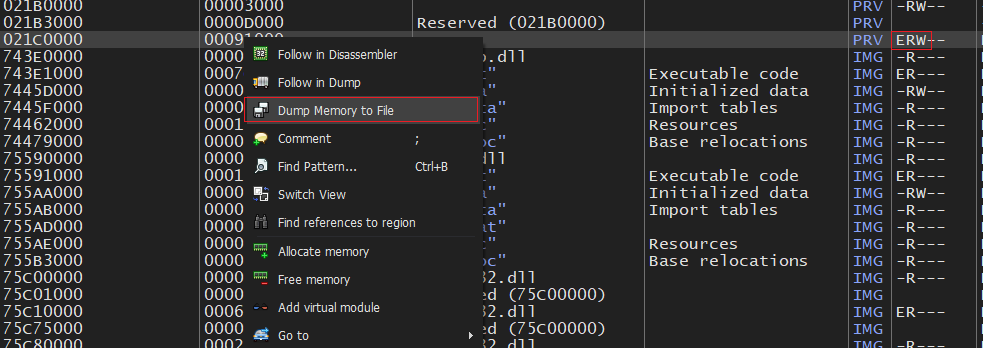
We can follow on memory map, then right-click on the specified memory region and dump it to a file
 dump memory region
Open the dumped file in any hex editor and get rid of the extra bytes before the MZ header, then save the file
 Removing Extra Bytes
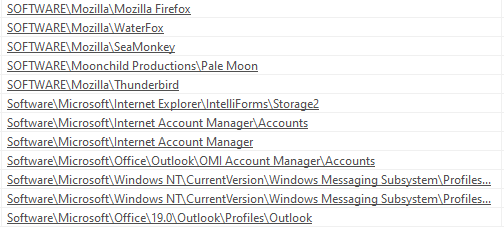
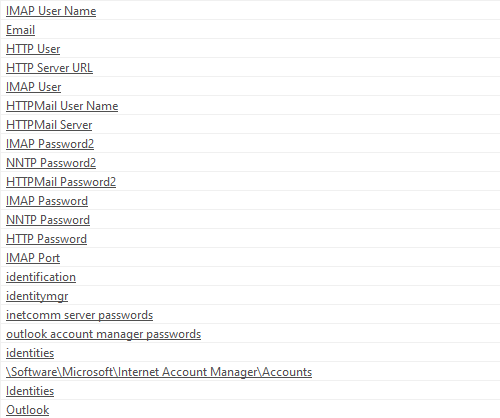
Now, we should have the clean unpacked sample, and to make sure, we can inspect its imports and strings again. In fact, from strings alone, we have a pretty good idea about what the malware sample might be doing (information stealer) as we see below
 strings
Among other things, strings also reveal the internal path of the project build

Furthermore, if we search for some of the unique strings it would give away the sample varient which is one varient of RacoonStealer.
Now, let`s start examining the malware by Loading the unpacked sample into IDA. The malware begins by creating a mutex (function sub_DD2DF7) to prevent the malware from being executed twice on the same host.
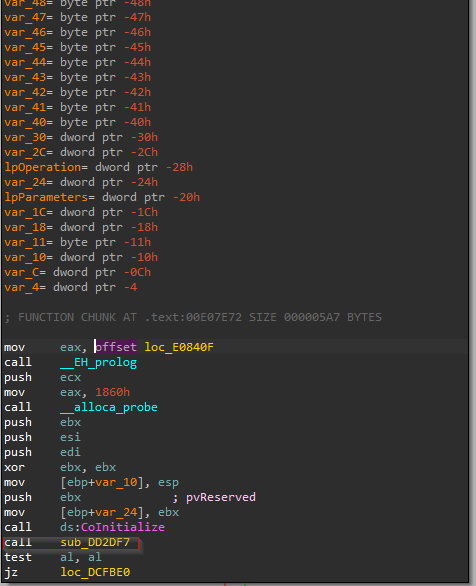 Main Function
We can see the API OpenMutexA inside the function, with ESI register holding the mutex name.
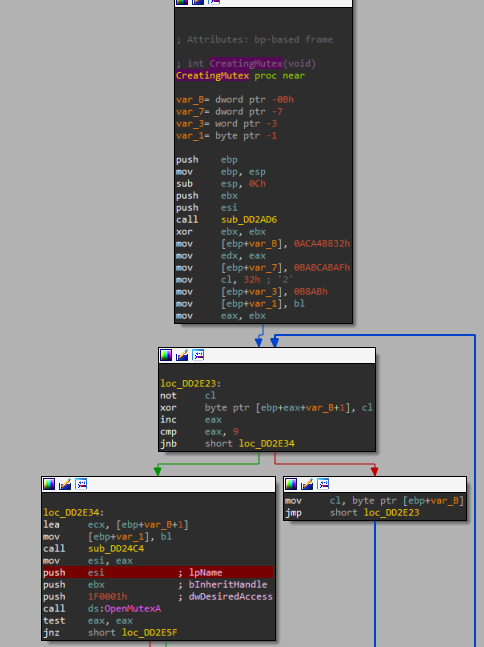 CreateMutex
If we debug the sample using IDA, and we examine the address at ESI, we can obtain the Mutex name as below
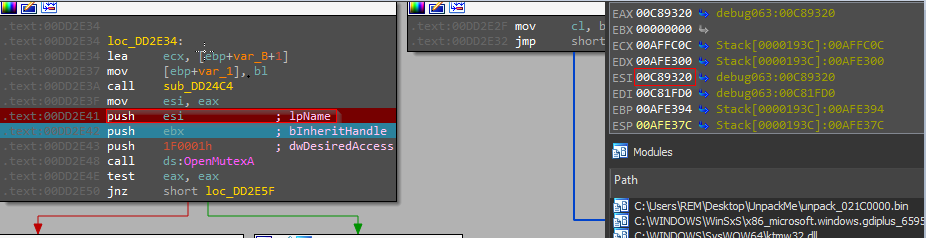 IDA Debugging to Find Mutex Name
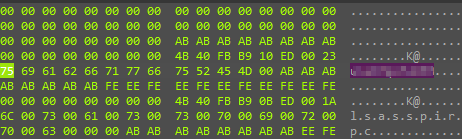 Mutex Name
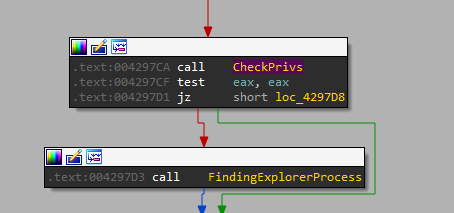
Next, the malware calls (435AE5) which I renamed CheckPrivs below to check if the process is running with LOCAL SYSTEM privileges, if so, it will proceed by finding explorer.exe process, duplicate its token and continue execution with its privileges.
 checking Priviliges
Here is the portion within the next function (435B8A), renamed Findingexplorerprocess where it is trying to find explorer.exe
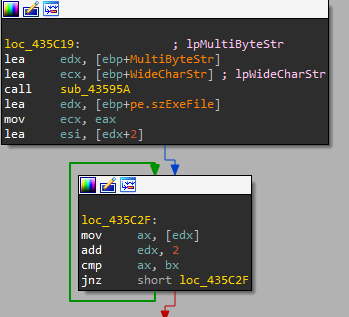 Comparison Loop
Comparison looking for explorer.exe is shown below from X32dbg
 X64dbg looking for explorer process
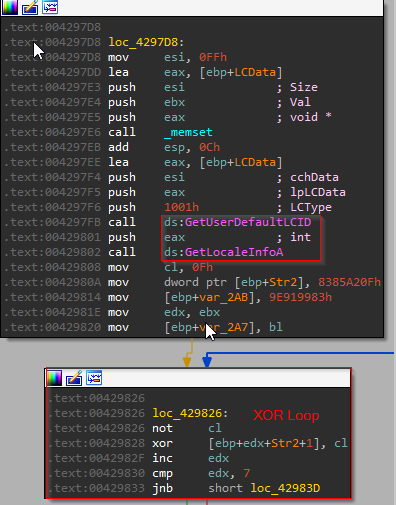
Next up, the execution will continue to find the local machine language by calling both GetUserDefaultLCID and GetLocaleInfoA.
 Checking Language
Then it dynamically uses XOR in a bunch of loops to check a set of languages (Russia, Kazakhstan, Uzbekistan, etc) if they match, the malware will stop execution and exit. The malware uses repetitive XOR blocks to decrypts each segment during execution. At the block location (loc_429AE3), before jumping into a different block of code that appears to have some base64 strings, it reveals a special string after finishing the XOR loop.
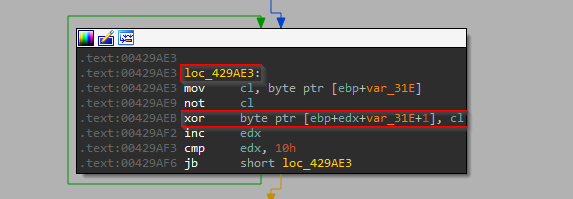 Last XOR spits out the key
The key is revealed in the memory segment below
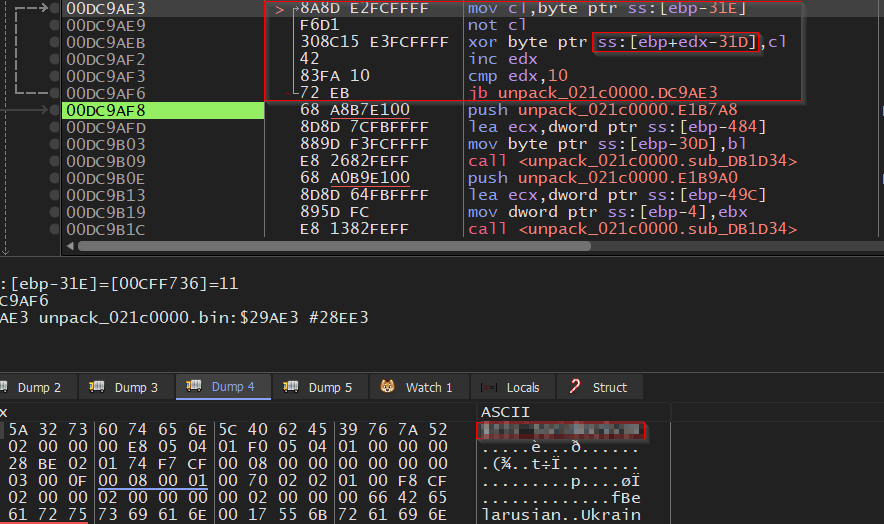 RC4 Key
This will turn out to be the RC4 key that the malware uses to encrypt all command and control (C2) communications.
In the next section, we encounter three Base64-encoded strings. These are likely to contain critical data such as C2 server addresses.
 Three Base64 strings
Stepping over in x32dbg until we hit function (DB47F6), after the function call, we immediately notice a C2 domain pops up
1
https[::]//tttttt.me/ch0koalpengold
 staging domain appearance
Let`s step back for a moment and look back before the function gets called, the function had two parameters that were pushed into the stack, one is the base64 decoded value of the first base64 string shown previously, the other is the RC4 Key we just discovered.
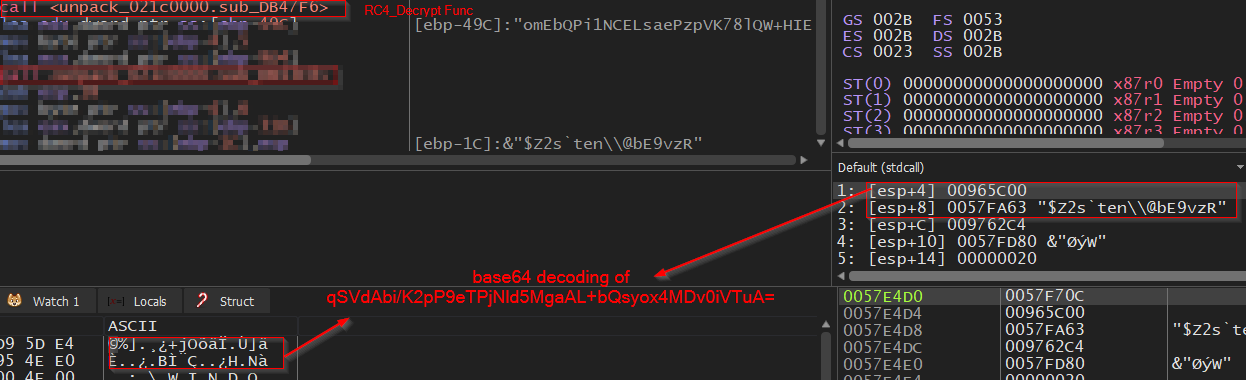 RC4 Decryption Function
Therefore, we know that this function is using the decoded string along with the RC4 key to decrypt its first C2 domain. If we look back even further, we can get the function that performs the base64 decoding, let`s rename & label those two important functions.
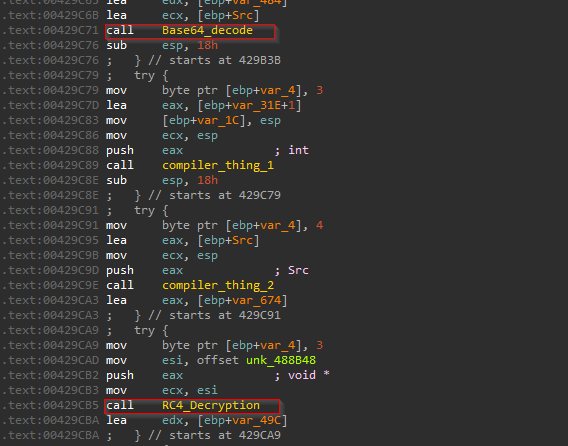
 Renaming Functions
Digging deeper into the RC4 Decryption function, we notice 4 subroutines, from there we can identify the RC4 algorithm by checking both functions (41468E) and (414712)
 Inside RC4 Decryption Function
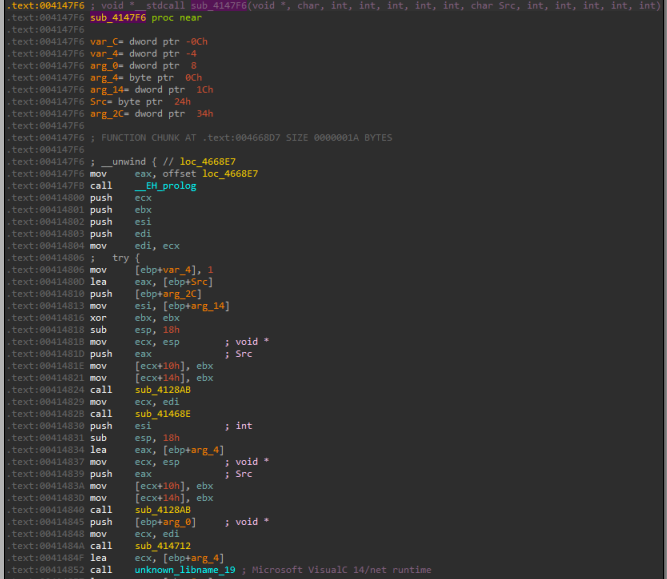
below screenshots clearly shows the key Scheduling Algorithm (KSA) generation of the RC4 (the 256 loop is a quick giveaway), then the key stream is being XORed with each byte of the payload in the other function.
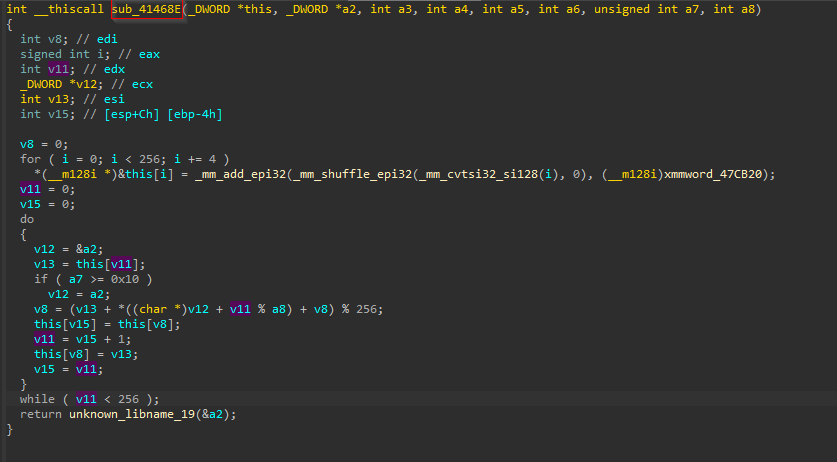 RC4 Algorithm
Going further after RC4 decryption of the domain, we should expect to see some network communication to that C2 domain, this takes place at function (430F27) as we see below
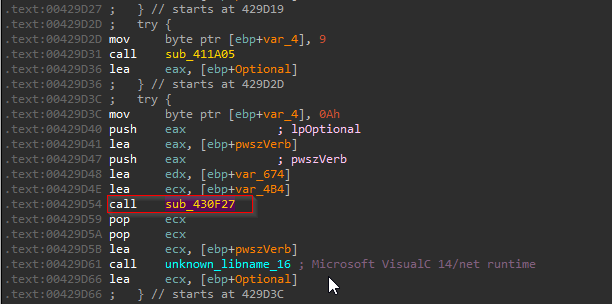 HTTP REQ Function
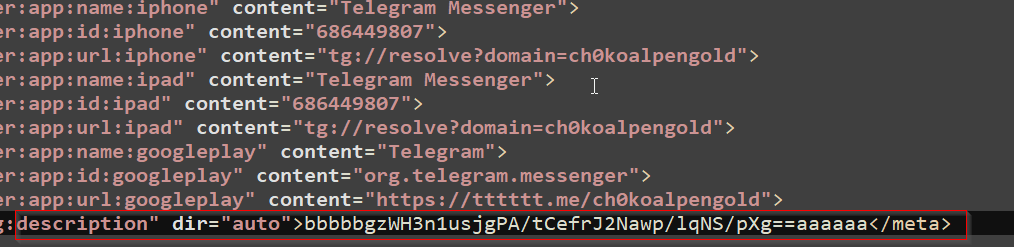
Next function appears to be checking for certain strings in the response body of the HTTP request. We clearly see some html tags "description and dir=auto>
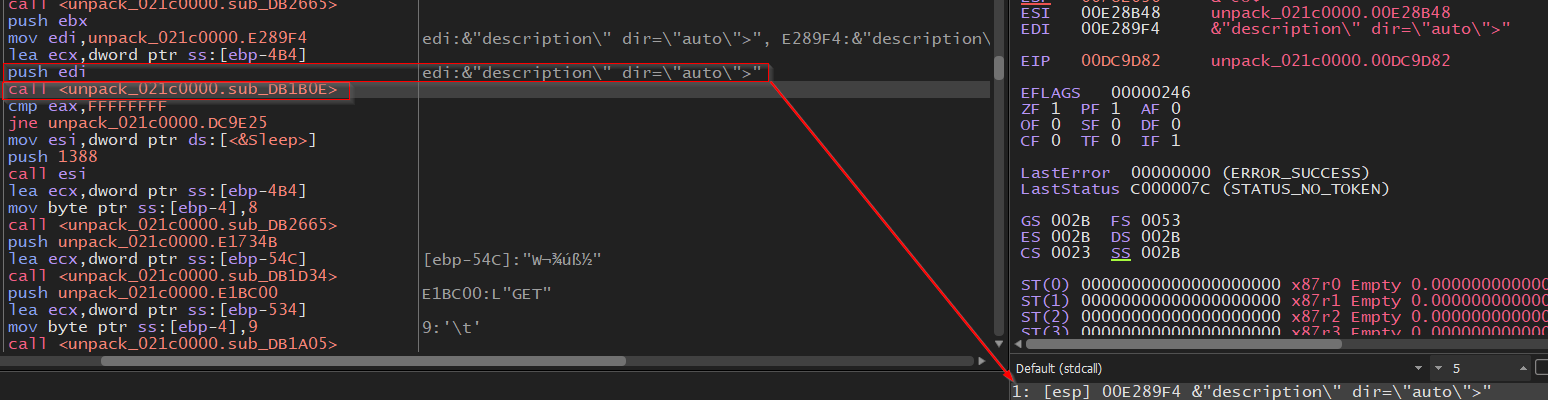 HTTP Response Comparison
We labeled the function Rsponse_comparsison in IDA
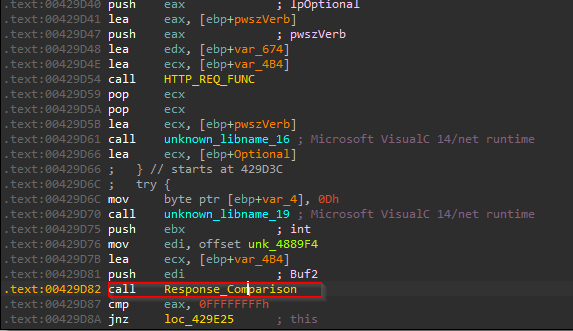 HTTP Response Comparison
To make sense of it, we checked the C2 link that the malware was trying to request tttttt.me/ch0koalpengol, then looking for the html strings needed, nothing was found. It became clear that the C2 server was no longer active at the time of our analysis.
 Telegram Page
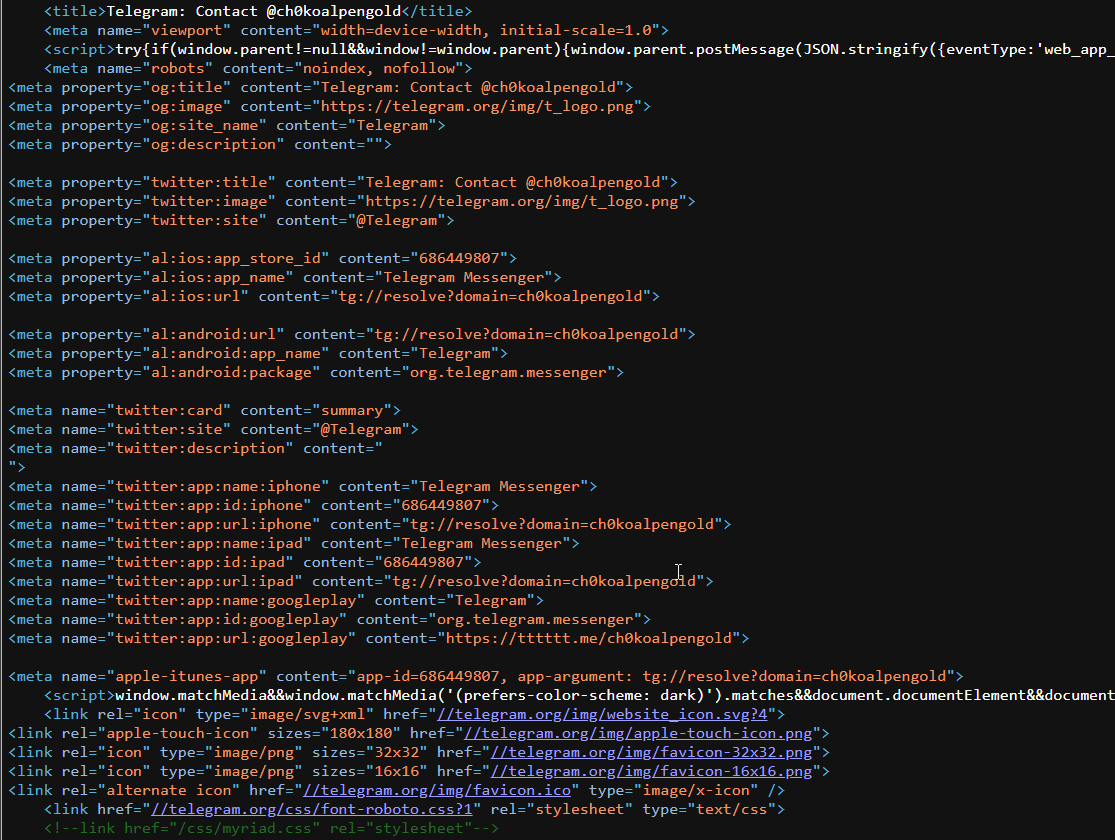 Telegram HTML Page
As a result of that, the malware was stuck at the next block of code, Which is a loop that sleeps for 5 sec. , then continues to request the same domain until the string match is found.
 HTTP REQ Loop
Apparently, this lack of communication with the C2 server hindered our dynamic analysis as the malware was not able to retrieve this string to continue its operation, limiting our ability to observe the full extent of the malware’s intended behavior.
So, we have to come up with a different approach to emulate this on our local network to further continue debugging and discover the rest of the stealer operation.
MALWARE C2 EMULATION
So far, we’ve understood how the malware utilizes RC4 encryption to decrypt its command and control (C2) communications. We also identified that the Base64 string qSVdAbi/K2pP9eTPjNld5MgaAL+bQsyox4MDv0iVTuA= was actually a Telegram C2 domain after decoding and decryption. To continue with our debugging, we need to modify the code by replacing this Base64 string with our own, which will simulate a C2 server on a local network.
To proceed, we’ll set up an HTTP server on our localhost. Then, prepare a similar C2 page by copying the Telegram HTML code from the original C2 domain to our new page. Additionally, we’ll add the missing HTML strings that the malware would expect to retrieve, ensuring that the local C2 server behaves in a way the malware expects. This setup allows us to continue analyzing the malware’s interactions with the C2 and track its behavior in our own environment.
I have added a simple string for testing, Mine would be saved and hosted at localhost/telegram.html
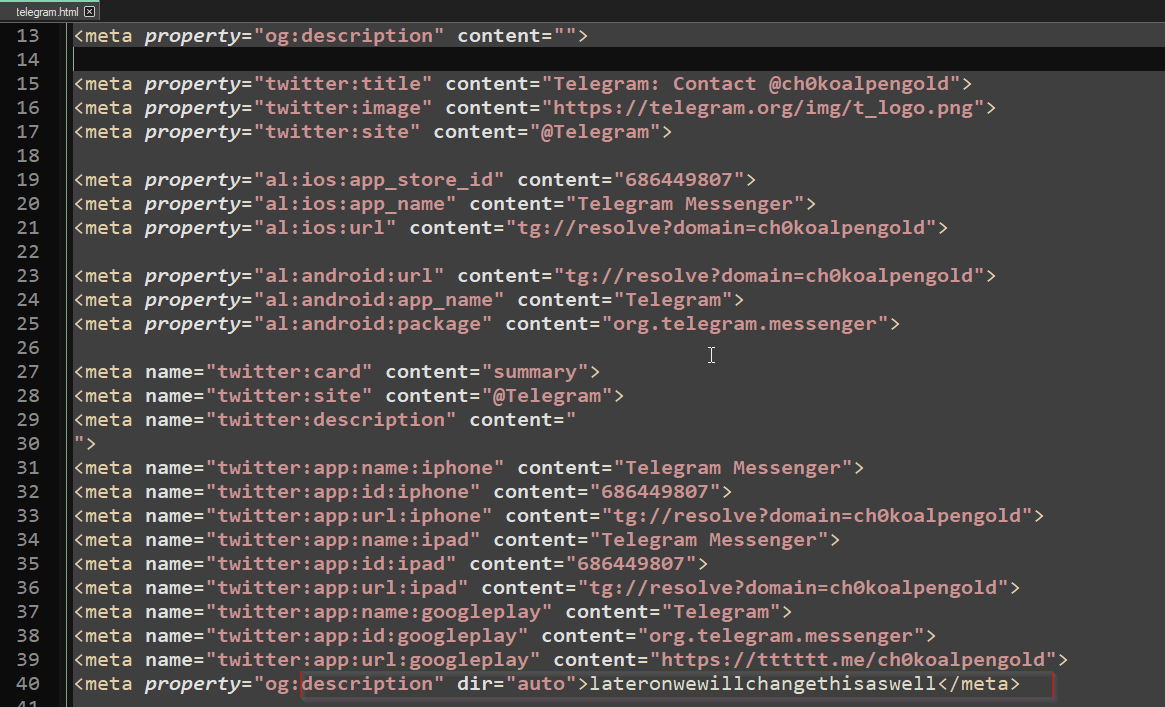 Local Modified Copy of Telegram Page
knowing the RC4 key, we can assemble our base64 with the help of CyberChef as below
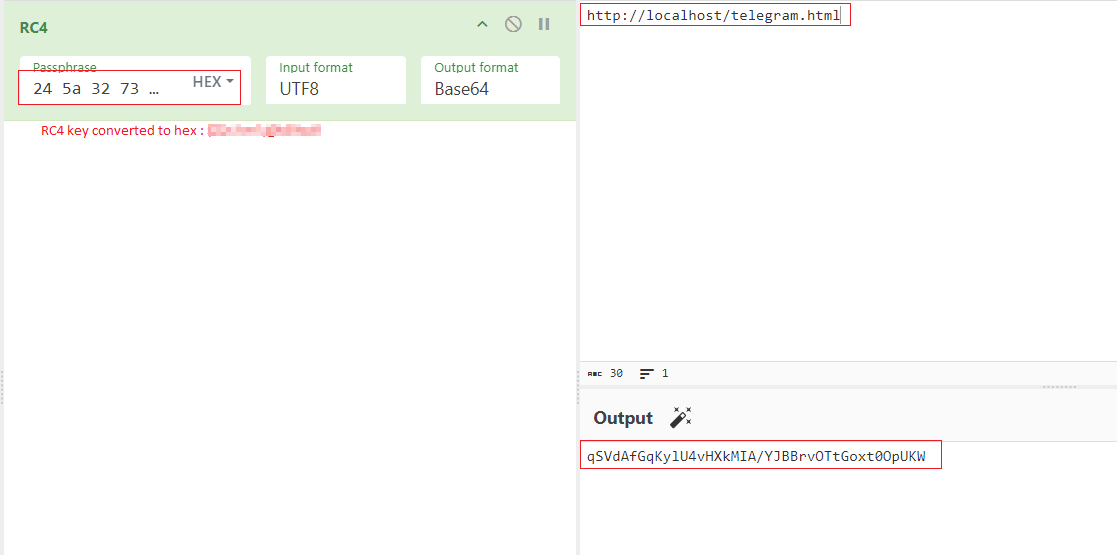 CyberChef Base64
Now, let’s edit our malware file with a hex editor and search for the base64 string (qSVdAbi/K2pP9eTPjNld5MgaAL+bQsyox4MDv0iVTuA=), our goal is to replace that portion with our own base64 so that after malware decodes it, we get our own telegram.html page.
 Malware with HexEditor
After highlighting the reqiured string, Write-click, then choose paste write and save the file.
Let`s test it by going to the RC4 Decryption instruction (*7F6) and continue debugging, we should see our telegram page being resolved.
 Local Telegram Page
Now, if we continue debugging from where we left off, we should jump at the block after the HTTP request, and our embedded string - representing the simulated C2 domain - should appear as expected
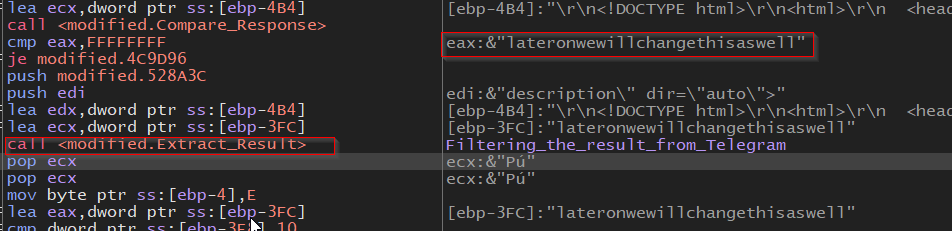 Modified String
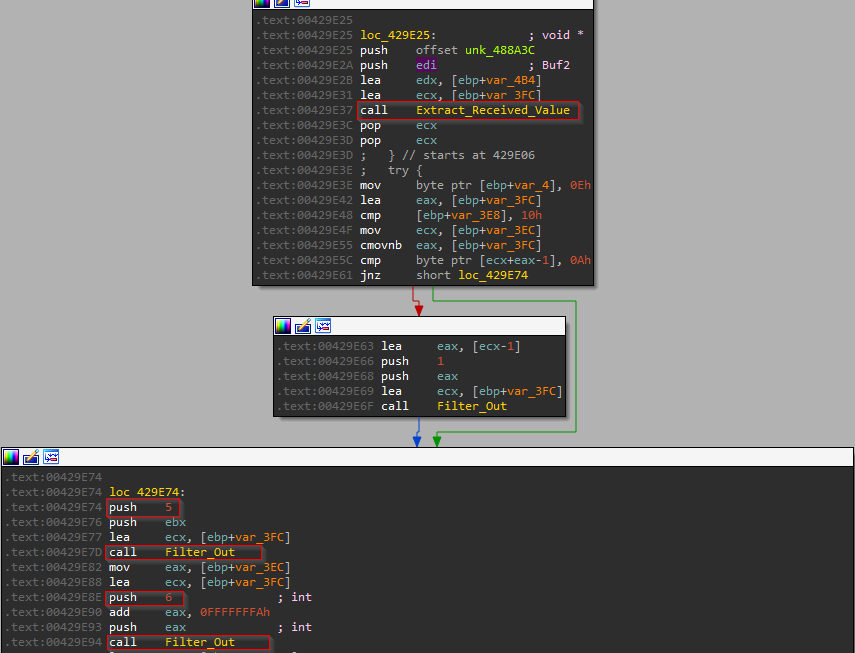
Next, if we step over a few instruction, we would start to see the string being filtered.
 Filtered String
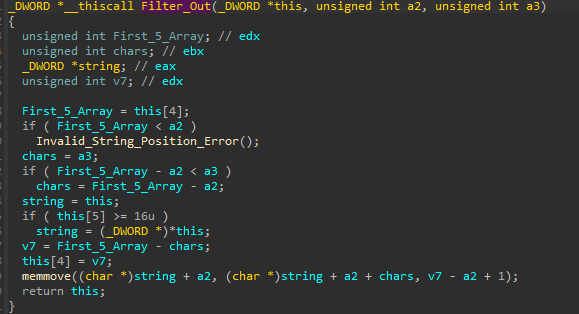
If we look closer after the function that extracts the string, we can observe two successive calls to the same function, which we have renamed filter_out for clarity. This function plays an important role in filtering the extracted data. In the first call, the value 5 is being pushed into the stack before the function call, and value 6 in the second function call, which corresponds to filtering out the first 5 characters from the strings, and the last 6 characters respectively.
 Filtered String Function
Here is the code inside the function
 Filtered String Function
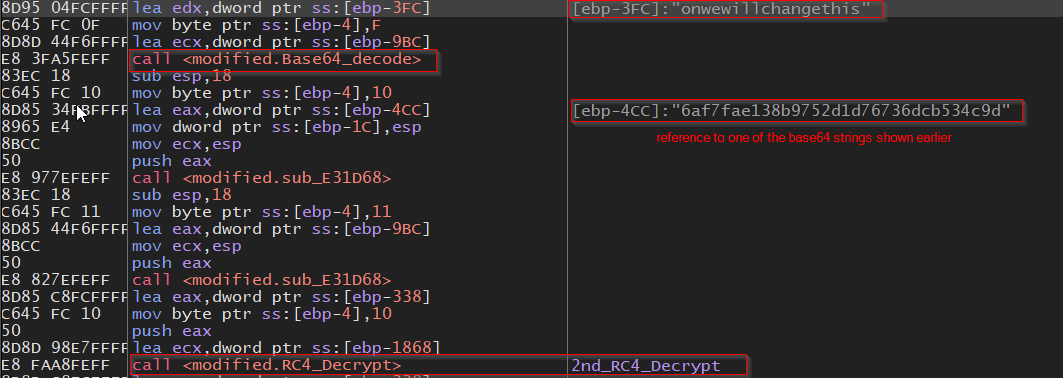
Moving on, after our string was filtered, we observe additional calls to both the Base64 decoding and RC4 decryption functions. These calls reference one of the hardcoded Base64 strings we saw earlier. This indicates that the malware is once again decoding and decrypting data.
 2nd RC4 Decryptian to get the main C2
We know that RaccoonStealer leverages the middle stage we identified earlier (a Telegram channel) to retrieve its main C2 domain from the string, which was missing in our case.
In the screenshot above, the RC4 Decryptian function (RC4 Decrypt) is used to decrypt our retrieved and filtered string using the referenced hardcoded base64 string as the RC4 key. The output of this decryption process should reveal the malware’s main C2 domain.
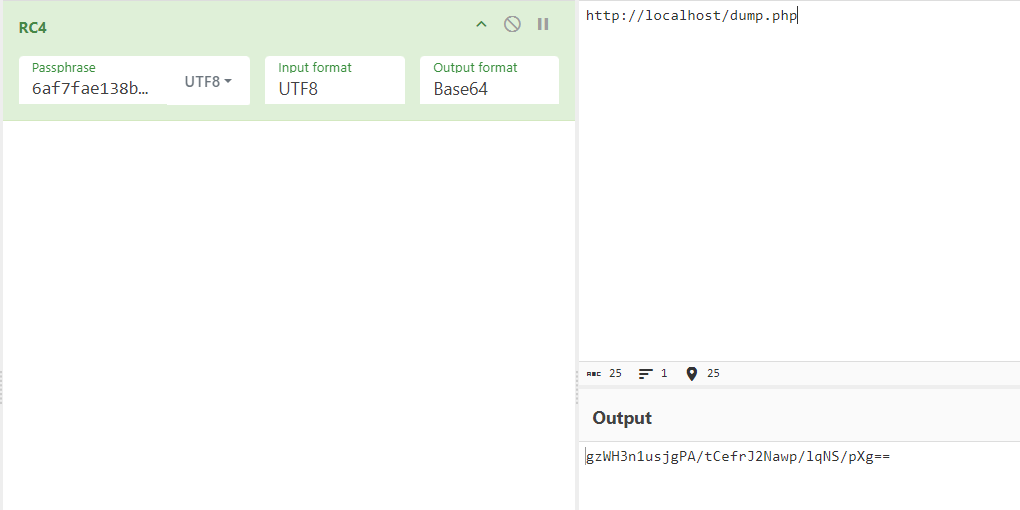
Obviously, our test string currenly does not make sense to the malware opertion. So, we can simulate the operation by reversing the process, similar to what we have done with the telegram domain. Given the new RC4 key, we can asssume a C2 domain hosted in our local server (localhost/dump.php), encrypt it using the RC4 Key (6af7fae138b9752d1d76736dcb534c9d) and produce a base64 sting that can be replaced by our test string in our telegram HTML page.
 2nd RC4 Decryptian to get the main C2
Now, the generated Base64 string will serve as the main C2, replacing the old string. Remember, we need to pad the string with 5 characters at the beginning and 6 characters at the end. This padding ensures that when the string is passed through the filtering function, it results in the correct domain (localhost/dump.php).
 Main C2 Base64 String
let`s puase for a moment and understand how this stealer works and how it usually communicates to its C2.
RacoonStealer C2 Operations
We can understand the C2 operations from various samples that exist on public sandboxes like any.run.
 C2 Operation
RacconStealer operations usually works by following the below sequence:
POST Request to its main C2 server (localhost/dump.php in our case) with identification paramters in the body (botID, configID, etc).
The server replies with important malware configuration including a URL for the malware to download additional DLLs required for its stealing operations.
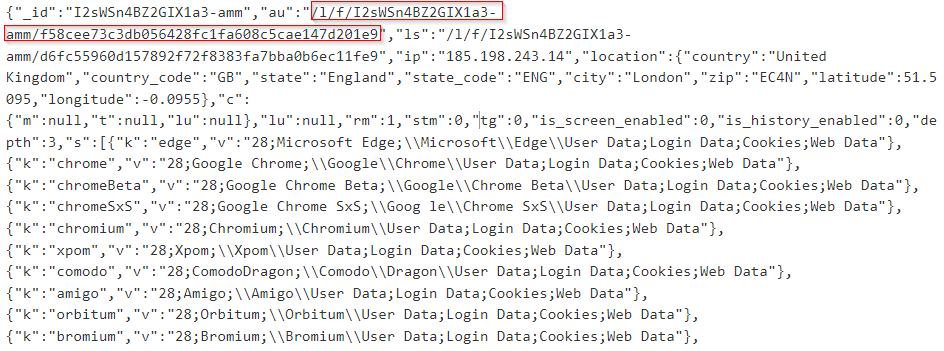 Malware Config with the URL
- The malware Download/Request the required DLLs (legitimate DLLs) and continue by collecting host information based on its config, finally, exfiltrate all data to the C2 server.
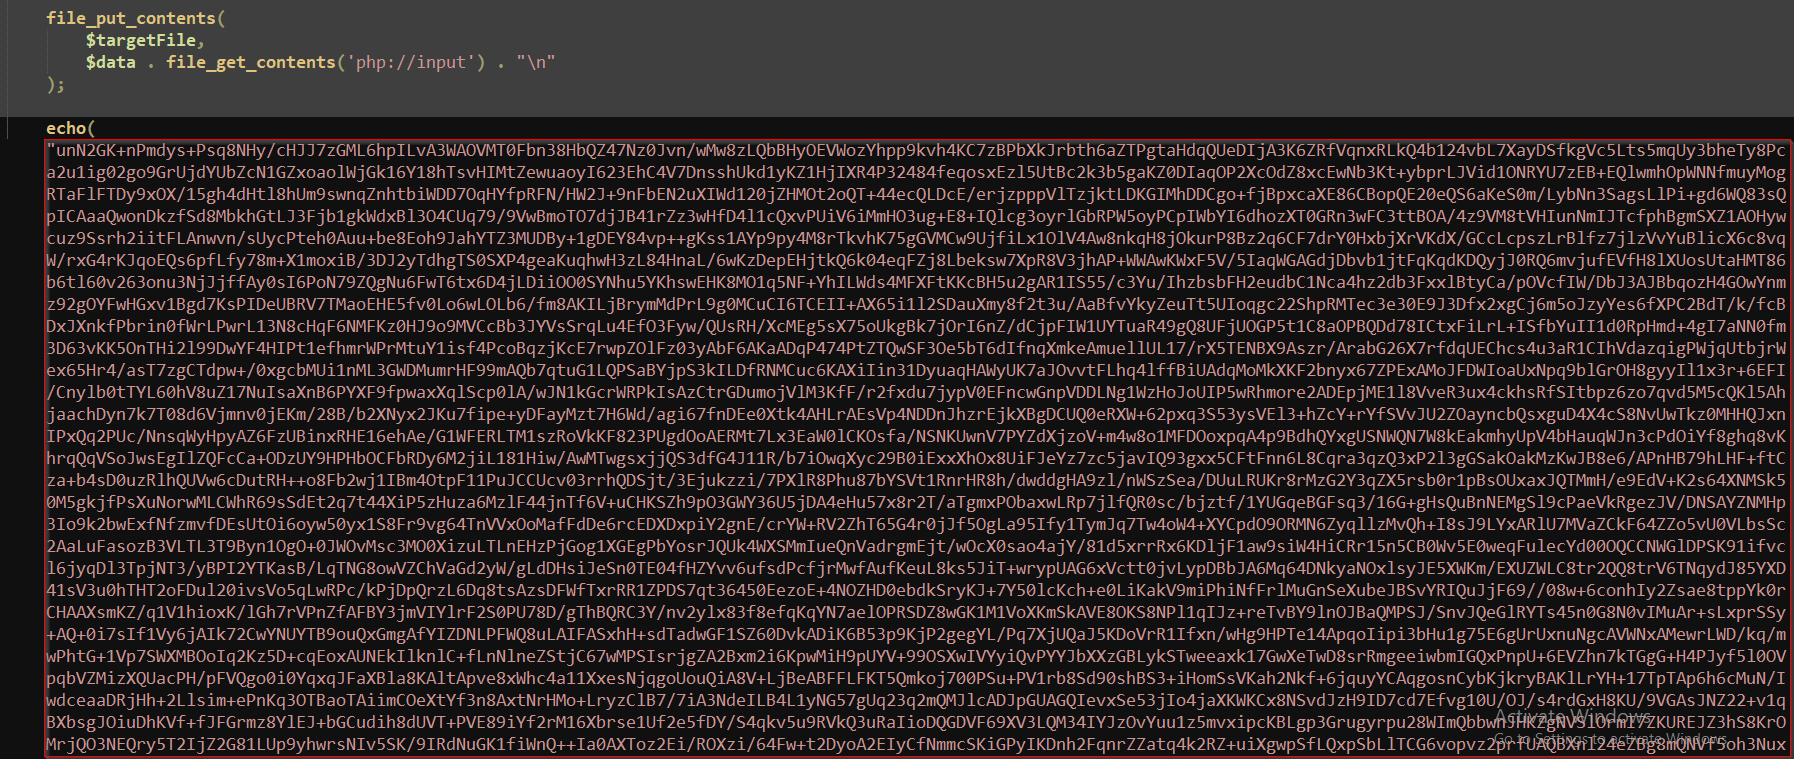
We could use a proxy to capture the malware request to the server and observe the payload, in our case, we prepared a PHP (duip.php) page that will dump the request to a file on disk.
A very handy php script that can perfrom this can be found here
1
https://gist.github.com/magnetikonline/650e30e485c0f91f2f40
Now, if we return back to our X32dbg and continue after the RC4 Decrypt function of the main C2 (duip.php), few instructions later we hit the first POST request to the server.
 POST Request
The dumped request is shown below, The payload contians the Bot-ID and Machine ID ecrypted with the same RC4 key.
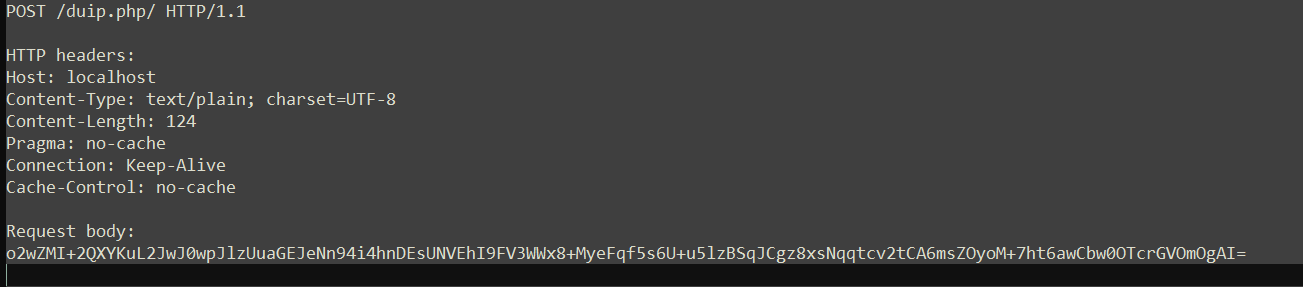 First Request dumped
Looking closer at the script (duip.php), it returns the string "Done" which is not expected by the malware, this will cuase the malware to stop and exit later on when it tries to check the server response.
 Return Value
After the below section which checks the return values, malware exists.
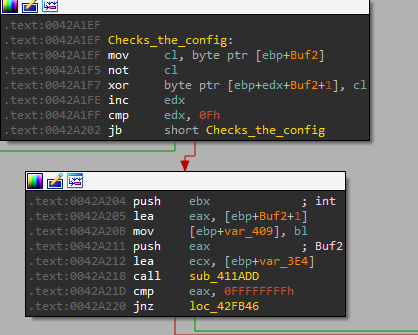 Checking Configuration
To fix this, we need to edit the response wihthin the script, and provide the malware with an expected payload response (we got a fake response from the same sandbox sample shown earlier).
 Replacing string with our payload within the PHP script
As mentioned, after decoding this payload with the RC4 key, it will reveal several DLLs that the malware downloads to the infected host.
Once downloaded, these DLLs will be placed in the AppData\LocalLow directory under the user’s profile, a location often used by malware to avoid detection.
Malware Config with the URL
 Payload decoded from X32dbg
Since we don’t have access to the correct URL to download the required DLLs and as we are emulating the stealer on our own network, we obtained the necessary files from a different RaccoonStealer sample available on the any.run sandbox.
This way, the malware will continue its operation, allowing us to uncover more of its capabilities. By supplying the DLLs from a similar RaccoonStealer sample, we enable the malware to proceed as it would in a real-world infection, executing its next steps
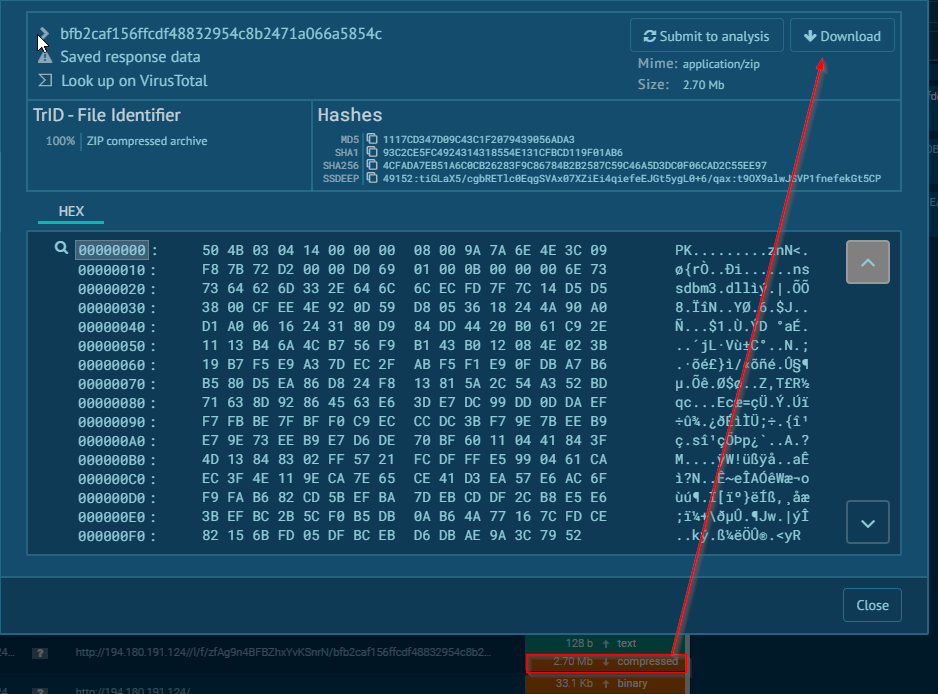 DLLs Zipped
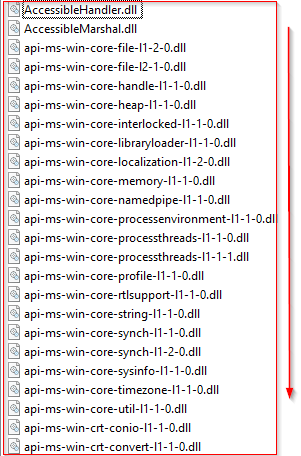
Then, we placed the files in the location where the malware expects to find them, that is under locallow directory.
 Files dropped in LocalLow folder
Those are legitmate third-party DLLs required by the malware to gather information about the infected machine, some of the DLLs includes softokn3.dll , sqlite3.dll, nss3.dll, nssdbm3.dll and others.
DLLs are shown below:
 sqlite3.dll
At this point, the malware would perform the bulk of its stealing functionality, including stealing passwords, credit card information, browser cookies, history, etc.
As an example, sqlite3.dll is utilized to perfrom SQL commands to steal information from browsers of the infected machine.
 sqlite3.dll
Continuing the debugging process with X32dbg, we observe that the malware successfully dumps a file named machineinfo.txt in the AppData\LocalLow directory. This file contains detailed information about the infected machine, including system-specific data such as hardware details, OS version, and other identifying characteristics. Additionally, it includes the version number of RaccoonStealer.
 Machineinfo.txt
Turning our attention to the registry key function calls, if we search for OpenRegKey, we encounter multiple calls within the code. Focusing on the highlighted function below
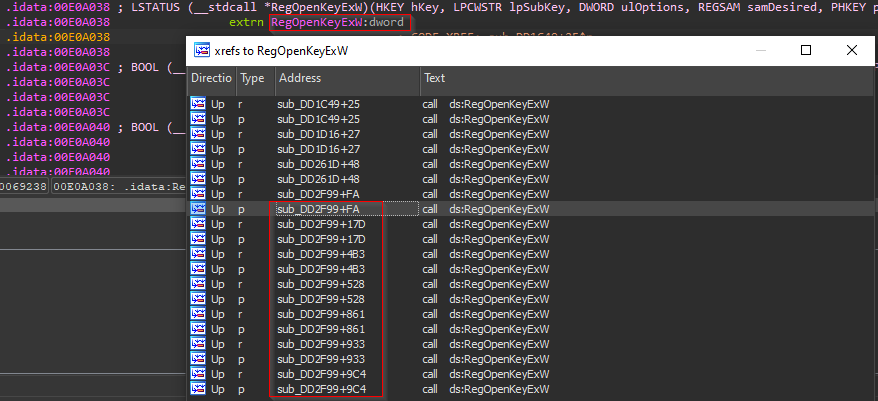 Looking for RegOpenKey
By tracing this particular call, we can identify which registry keys the malware is targeting, the key name Uninstall is a common registry key used to check installed software running on the host
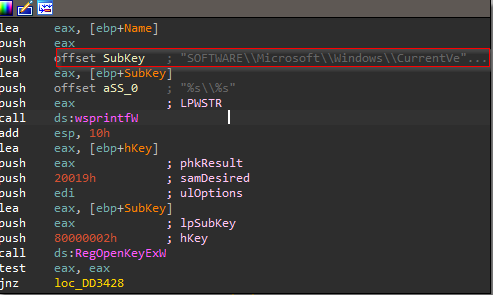 Installed Software Key
Malware commonly uses the API call GdipSaveImageToFile to save images to a file, and by examining this section of code, we can determine that it is being used to perform screen capture from the infected host.
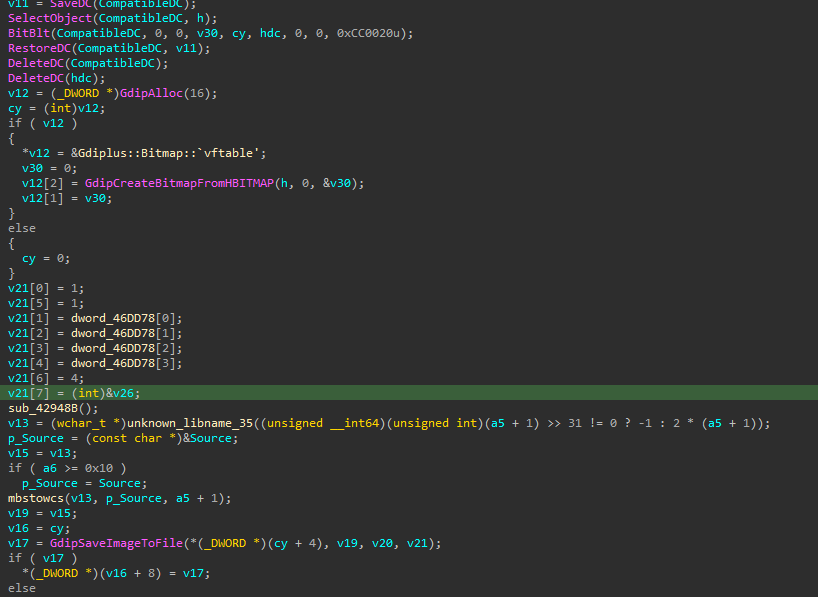 GdipSaveImageToFile
Checking this API Call cross references, we can obtain the main function address
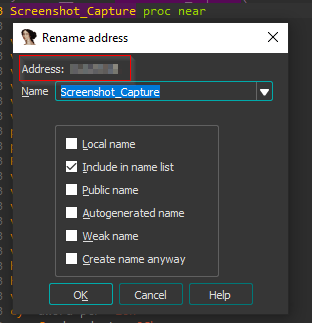 screencapture address
Finally, the malware attempts to remove all its traces by executing a command commonly found in many public instances of RaccoonStealer.
 Malware Deletion